background에 brush를 이용해서 그라데이션(Gradient) 만들기
그라데이션 처리는 아래 그림과 같이 여러개의 색을 섞어 그라데이션을 만드는 것을 뜻한다. Modifier에서는 파라미커로 Brush를 받을 수 있는 메서드가 있다. 우리는 이 Brush를 이용해 그라데이션을 만들 수 잇다.
fun Modifier.background(
    brush: Brush,
    shape: Shape = RectangleShape,
    /*@FloatRange(from = 0.0, to = 1.0)*/
    alpha: Float = 1.0f
)이 메서드에서는 세개의 파라미터를 받는다
- Brush : Gradient 방향 설정
- Shape : 모양 설정
- alpha : 투명도 설정
이전 글에서 Shape은 자세히 다뤘으므로 이번 글에서는 Brush와 alpha 값 만을 다루도록 한다.
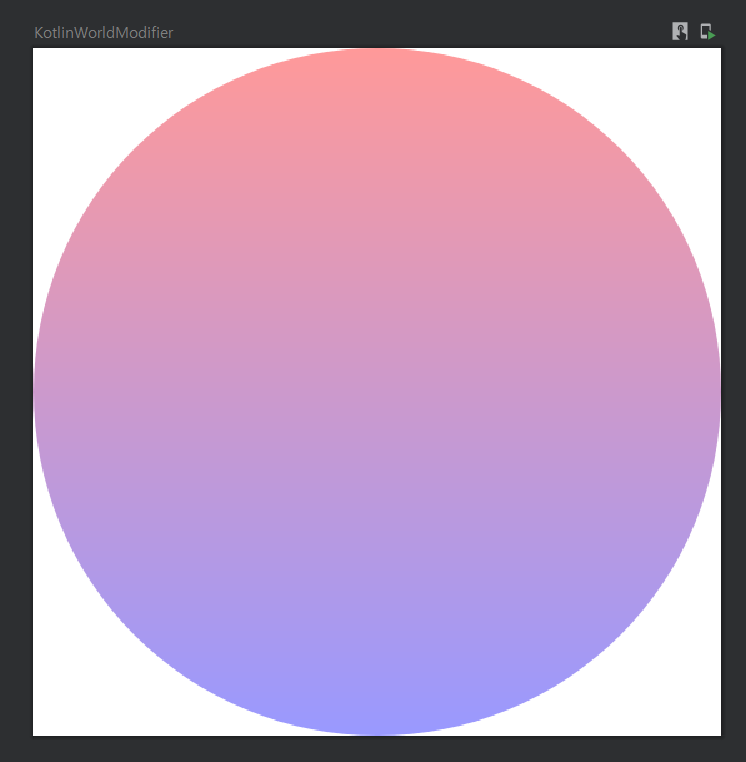
이 셋을 잘 다루면 아래와 같이 파스텔톤의 색상이 결합된 아름다운 원을 만들 수 있고, 자유자제로 모양을 만들 수도 있다.
@Preview(showBackground = true, widthDp = 200, heightDp = 200)
@Composable
fun KotlinWorldModifier() {
    Column(
        Modifier
            .background(
                brush = Brush.verticalGradient(listOf(Color.Red, Color.Blue)),
                shape = CircleShape,
                alpha = 0.4f
            )
    ) {}
}
자 이제 Brush다루기를 시작해보자.
Brush를 이용한 Gradient 설정
Brush는 Gradient를 다루기 위한 클래스들을 모아놓은 Sealed Class이다.
sealed class Brush이 Sealed Class를 상속받는 클래스는 다음과 같다.
- LinearGradient
- RadialGradient
- SweepGradient
*SolidColor은 단일 색상이므로 이 글에서 다루지 않는다.
우리가 사용할 수 있는 미리 정의된 Brush는 다음과 같다.
- linearGradient : 시작점에서 끝점으로 그라데이션 적용. LinearGradient을 생성한다.
- verticalGradient : 수직으로 그라데이션 적용. LinearGradient를 수직 버전으로 생성한다.
- horizontalGradient : 수평으로 그라데이션 적용. LinearGradient를 수평 버전으로 생성한다.
- radialGradient : 중심점에서 바깥쪽으로 그라데이션이 적용된다. RadialGradient를 생성한다.
- sweepGradient : Gradient에 문지름이 적용된다. 색상을 문지르는것과 같은 효과가 적용된다. SweepGradient를 생성한다.
linearGradient
linearGradient는 시작점(start)에서 끝점(end)을 설정하여 시작점에 끝점 방향으로 그라데이션을 주는 LinearGradient Brush를 생성한다.
시작점을 왼쪽 위(Offset.Zero)로 놓고 끝점을 오른쪽 아래(Offset.Infinite)으로 두어 그라데이션을 만들어보자. 색상은 Red와 Blue의 조합으로 한다.
@Preview(showBackground = true, widthDp = 200, heightDp = 200)
@Composable
fun KotlinWorldModifier() {
    val redAndBlue = listOf(Color.Red, Color.Blue)
    Column(
        Modifier
            .background(
                brush = Brush.linearGradient(colors = redAndBlue, start = Offset.Zero, end = Offset.Infinite),
                shape = RectangleShape
            )
    ) {}
}

왼쪽 위는 빨간색, 오른쪽 아래로 갈 수록 파란색이 되는 것을 확인할 수 있따.
verticalGradient
verticalGradient는 수직 방향으로 그라데이션을 주는 LinearGradient Brush를 생성한다.
@Preview(showBackground = true, widthDp = 200, heightDp = 200)
@Composable
fun KotlinWorldModifier() {
    val redAndBlue = listOf(Color.Red, Color.Blue)
    Column(
        Modifier
            .background(
                brush = Brush.verticalGradient(colors = redAndBlue),
                shape = RectangleShape
            )
    ) {}
}
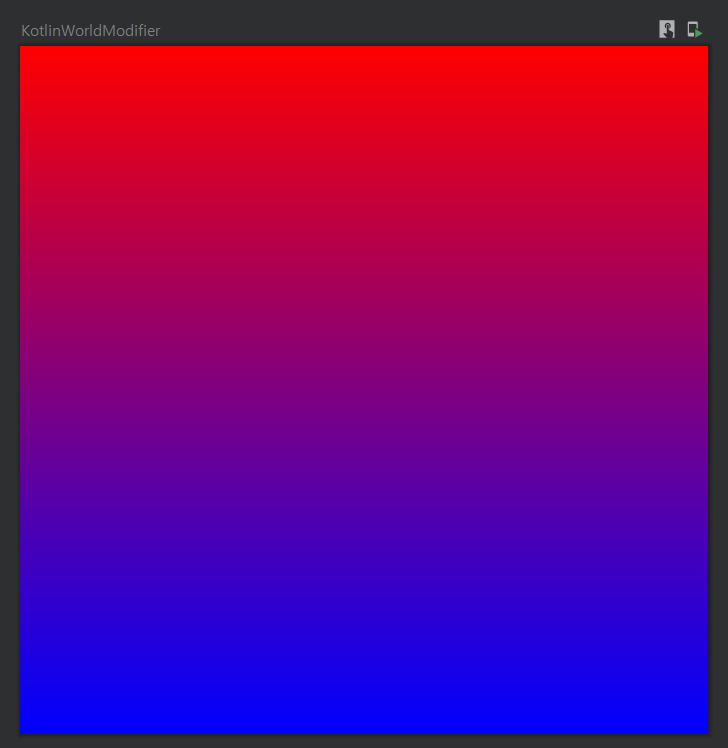
만약 일부분에만 Gradient를 주고 싶다면 startY(Gradient 수직방향 시작점 pixel), 와 endY(Gradient 수직방향 끝점 pixel)을 주면 된다.
@Preview(showBackground = true, widthDp = 200, heightDp = 200)
@Composable
fun KotlinWorldModifier() {
    val redAndBlue = listOf(Color.Red, Color.Blue)
    Column(
        Modifier
            .background(
                brush = Brush.verticalGradient(colors = redAndBlue,startY = 100f,endY = 200f),
                shape = RectangleShape
            )
    ) {}
}
horizontalGradient
horizontalGradient는 수평 방향으로 그라데이션을 주는 LinearGradient Brush를 생성한다.
@Preview(showBackground = true, widthDp = 200, heightDp = 200)
@Composable
fun KotlinWorldModifier1() {
    val redAndBlue = listOf(Color.Red, Color.Blue)
    Column(
        Modifier
            .background(
                brush = Brush.horizontalGradient(colors = redAndBlue),
                shape = RectangleShape
            )
    ) {}
}
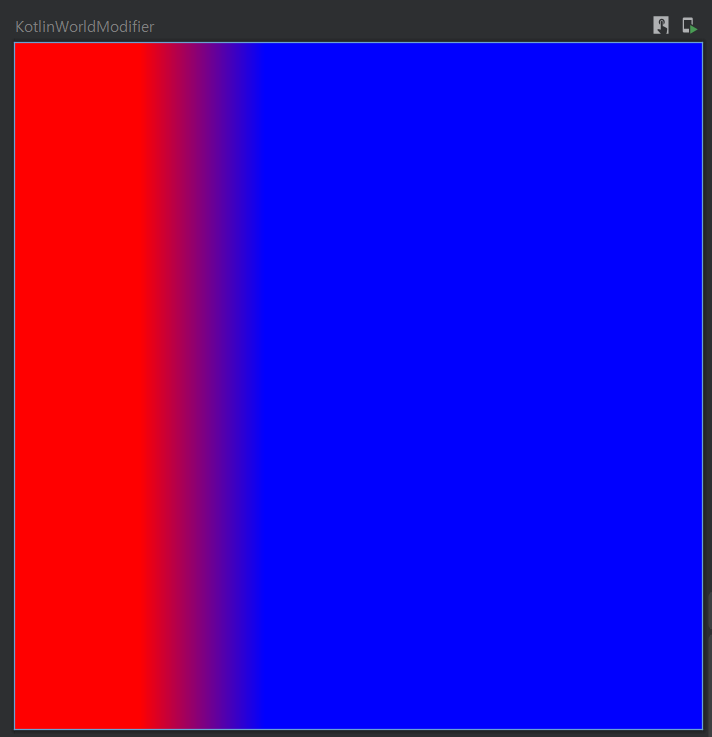
만약 일부분에만 Gradient를 주고 싶다면 startX(Gradient 수평방향 시작점 pixel), 와 endX(Gradient 수평방향 끝점 pixel)을 주면 된다.
@Preview(showBackground = true, widthDp = 200, heightDp = 200)
@Composable
fun KotlinWorldModifier() {
    val redAndBlue = listOf(Color.Red, Color.Blue)
    Column(
        Modifier
            .background(
                brush = Brush.horizontalGradient(colors = redAndBlue, startX = 100f, endX = 200f),
                shape = RectangleShape
            )
    ) {}
}
radialGradient
radialGradient 메서드는 중심점에서 바깥으로 그라데이션을 생성하는 RadialGradient Brush를 생성한다.
@Preview(showBackground = true, widthDp = 200, heightDp = 200)
@Composable
fun KotlinWorldModifier1() {
    val redAndBlue = listOf(Color.Red, Color.Blue)
    Column(
        Modifier
            .background(
                brush = Brush.radialGradient(colors = redAndBlue),
                shape = RectangleShape
            )
    ) {}
}
radialGradient는 중심점과 반지름(radius)을 픽셀로 설정할 수도 있다. 픽셀좌표계로 (200,300)을 중심점으로 설정하고 반지름이 400인 radialGradient를 만들어보자.
@Preview(showBackground = true, widthDp = 200, heightDp = 200)
@Composable
fun KotlinWorldModifier() {
    val redAndBlue = listOf(Color.Red, Color.Blue)
    Column(
        Modifier
            .background(
                brush = Brush.radialGradient(colors = redAndBlue, center = Offset(200f, 300f), radius = 400f),
                shape = RectangleShape
            )
    ) {}
}
중심점과 반지름이 Custom하게 설정된 것을 확인할 수 있다,
sweepGradient
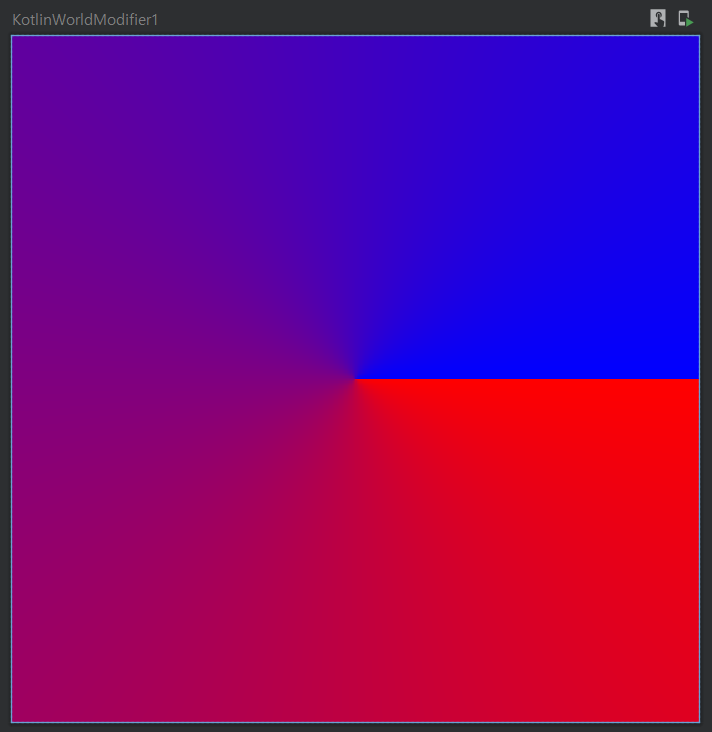
sweepGradient는 색상을 문지르는것과 같은 효과가 적용되는 SweepGradient Brush를 생성한다.
@Preview(showBackground = true, widthDp = 200, heightDp = 200)
@Composable
fun KotlinWorldModifier1() {
    val redAndBlue = listOf(Color.Red, Color.Blue)
    Column(
        Modifier
            .background(
                brush = Brush.sweepGradient(colors = redAndBlue),
                shape = RectangleShape
            )
    ) {}
}
sweep 중심점을 옮길 수도 있다. pixel좌표계로 (100,100) 으로 중심점을 옮겨보자.
@Preview(showBackground = true, widthDp = 200, heightDp = 200)
@Composable
fun KotlinWorldModifier() {
    val redAndBlue = listOf(Color.Red, Color.Blue)
    Column(
        Modifier
            .background(
                brush = Brush.sweepGradient(colors = redAndBlue, center = Offset(100f, 100f)),
                shape = RectangleShape
            )
    ) {}
}
중심점이 100,100으로 옮겨진 것을 확인할 수 있다.
alpha를 이용한 투명도 설정
자 이제 마지막이다. alpha를 이용해 투명도를 주어 위의 원색을 파스텔톤으로 바꿔보자. linearGradient를 사용한다.
@Preview(showBackground = true, widthDp = 200, heightDp = 200)
@Composable
fun KotlinWorldModifier() {
    val redAndBlue = listOf(Color.Red, Color.Blue)
    Column(
        Modifier
            .background(
                brush = Brush.linearGradient(colors = redAndBlue, start = Offset.Zero, end = Offset.Infinite),
                shape = RectangleShape,
                alpha = 0.7f
            )
    ) {}
}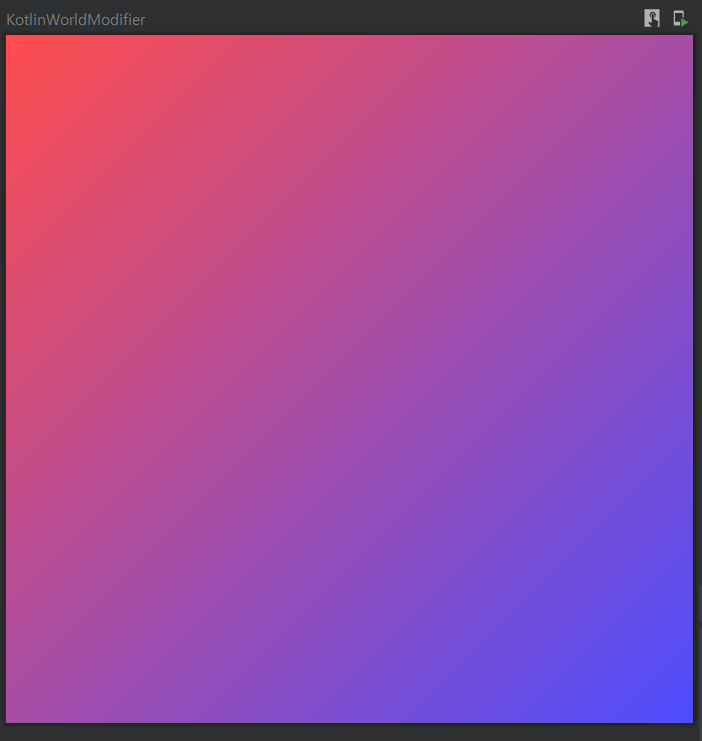
alpha값의 범위는 0.0f에서 1.0f이며 0.0f는 투명 1.0f는 원색이다. 위의 그림에서 우리는 0.7정도의 투명도를 주어 파스텔톤을 만들었다.

